Monday, September 28, 2020
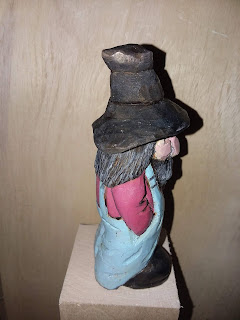
Leprechauns
Tuesday, September 22, 2020
Sleigh Set Finished
I finally finished the Sleigh Set. I had to wait a few days because I had to order a special chord/ string for the lashings and reigns.
And a little video
Mac Farsider
Saturday, September 19, 2020
SANTA SLEIGH AND REINDEER UPDATE
I finally have the miniature set all painted up and mounted to the base.
My oldest daughter told me a few years ago that the reindeer look more special if they are painted with the details. I took that to heart, even with this miniature version.
The ruler in the background is there to show exactly how miniature this set is.
French Apple Bread Pudding
My wife picked up a bag of Cortland apples earlier in the week. This is the time of the year that is considered an apple picking season.
I decided to make a bread pudding with apples. This is a standard and simple recipe that takes very little work to prepare.
Not my picture
Ingredients
5 small apples, cored, peeled, and diced. I don't chop my apples up to fine.
3 eggs beaten
1 14oz can of sweetened condensed milk
1 - 3/4 cups of hot water
Ground Cinnamon to taste
Cinnamon Sugar, Optional
a tsp of vanilla
4 cups of stale bread cubes
Raisins (Optional)
Directions
Preheat the oven to 350 degrees.
In a mixing bowl, combine all the wet ingredients and a dash of cinnamon to taste and mix well. Add the bread crumbs and apples and combine the wet and dry ingredients to moisten the bread.
Pour the mix into a buttered 9" square pan and sprinkle a dash of cinnamon over the surface. I actually have cinnamon sugar that I like to use for this step. Bake for 50 minutes at 350 degrees.
I like to serve this hot with a scoop of vanilla ice cream on top.
A great and easy dessert for apple season. Enjoy.
Tuesday, September 15, 2020
09/15/2020 Santa, Sleigh, And Reindeer Wood Carvings
One set that I carve which seems pretty popular is my Santa, sleigh, and reindeer set. A rather intense set that takes quite a bit of time due to all the pieces and then painting and finishing. I spend pretty close to a month of spare time doing each set.
The first set that I made went to my wife of course.
Through the years though, I have noticed one thing, the size. The first set that I made was about
I worked at scaling the display down and the smallest set that I have made was about 32" in length.
Another concern on my end is shipping. It's not that easy getting the right size boxes to ship this display safely. Spending over 30.00 just on shipping is a pretty big expense. I know I could order custom made boxes but that can be very expensive too. Especially for someone that doesn't manufacture these sets like a sweat shop does.
That's an item that takes up some serious real estate. The most convenient place to store this set is on top of a China cabinet once the Holidays are over.
So I believe that size is an issue.
I know it looks rough but it's in its early stages of development.
This set is about 1/3 scale of the sets that I usually do. The reindeer are about 1-1/2" x 3/8" X 2". The sleigh is 3" long by 1-1/8" wide.
I didn't measure the entire length but will estimate it to be close to or just a bit over 12" in length. A much better size than 42" I am thinking.
I'm thinking to maybe just keeping it simple, That will make for easy storage, easy shipping.
Sunday, September 13, 2020
Baked Ziti With Meatballs
Earlier in the week, I made a meatball parmesan. It turned out delicious but as usual, I made enough for an army, and with none of the kids home, we had a substantial amount of leftovers in the fridge.
I immediately thought of making a Baked Ziti with the leftovers and finally got around to it yesterday for dinner.
I like many types of baked Zitis. My favorite being the Baked Ziti Siciliano. But in this recipe, I wanted the Ziti to be about the meatballs. So this baked Ziti is a very simple, basic baked Ziti. Not even the standard addition of a Ricotta Cheese.
I started by taking apart the meatball parm. Separating the meatballs from the sauce. I then put the sauce in a saucepan. To that leftover sauce, I added a 24 ounce can of crushed tomatoes. I prefer crushed tomatoes to a sauce because it taste more like fresh tomatoes. I just get the plain crushed tomatoes. Not the type with basil added. I am not a fan of any commercial tomatoes or sauces with basil added to them. I think that they use way to much basil in them.
I like to add my spices to taste. Some crushed garlic, oregano, salt and pepper, a touch of fresh basil that's chopped, some hot pepper flakes, and one spice that I get off of Amazon, ground Fennel. I like the ground Fennel in my sauce because it is not only a healthy herb for the digestive system but it also adds that Italian sausage flavor without the added fat of the addition of sausage. It also compliments meatballs.
Boiling up some pasta is a no brainer. We have actually been using the Ronzoni brand lately because they came out with a pasta that cooks in 3 minutes instead of ten.
Now I know I call this Baked Ziti so sue me if you want, but I don't really use Ziti pasta for my baked Ziti. I use Rigatoni. Rigatoni is the same shape and size as a Ziti pasta except it has ridges on its surface which I like. These ridges hold onto the sauce.
While the pasta cooks, I slice up the meatballs getting 3 slices from each and also shred up 8 ounces of mozzarella cheese.
After I drain my Rigatoni, I put it back in the pan and add my sauce reserving about 3/4 of a cup. Give it a good mixing to combine the pasta and the sauce.
I top the Ziti like I would a pizza with the mozzarella cheese and the slices of meatballs.
Bake in a preheated oven at 350 degrees for 45 minutes. About 20 minutes into the baking time I cover the casserole dish with a sheet pan to prevent the top of the baked Ziti from getting burnt.
The reason that I bake the Ziti for as long as I do is that I want to form a crispy crust where the Ziti touches the casserole dish. That's the best part to me That crispy pasta.
I like to let the Baked Ziti sit for about 10 minutes before I cut into it after it comes out of the oven. That lets the cheese set up and makes for easy slicing when serving.
Enjoy with a nice salad and a nice bread with butter. I didn't show it in my picture above but I usually add a little extra sauce on the plate when serving this dish so that it's there for the bread to sop up.
Christmas Whistles
I have been making toy whistles for a few years now. These two in this post are my most recent.
I am attempting a new concept for the eyes on my toys and I am liking the results.
These whistles are 6" tall and 2" in diameter. They have been carved from reclaimed pine.
After carving they were sealed with boiled Linseed oil and then painted with acrylics, then several coats of polyurethane were applied. For a finishing touch, a light sanding and then the application of a beeswax polish.
These whistles will make a great addition to a decorative collection or as a stocking stuffer.
You can find more of my work at Mac Farsider's Carvings on Facebook or visit my shop on Etsy.
Monday, March 30, 2020
Homemade Toy Cars Made From Construction Grade 2" X 4"s
Sunday, March 22, 2020
Saturday, March 21, 2020
The Phoenix
I am not sure if anyone is into carvings like this. I just wanted to do something a little different.
This piece was done from a puzzle pattern but I wasn't liking how the pieces were locking together. So I kept it simple with just the Phoenix coming from the fire as 2 pieces.
Thanks for looking.
Check out https://www.etsy.com/shop/MacsFarsider if you get a chance.
Friday, March 13, 2020
Winnie The Pooh Themed Wall Art For Charity Donation
This beautifully crafted Winnie The Pooh Inspired design has been wood burned into a piece of 1" x 8" cherry wood. The picture was found surfing the web. I do believe it was an original illustration.
After the oval was cut it was rounded over with a .25" router bit, sanded smooth with up to a 200 grit paper and then coated with Boiled Linseed Oil. After the oil was dry, it was again sanded and then several coats of polyurethane were applied on both the front and back with sanding between coats.
A hey hole slot was routed into the back for the ease of wall mounting this piece of art.
It hangs very well on something as simple as a double-headed tack.
Saturday, March 7, 2020
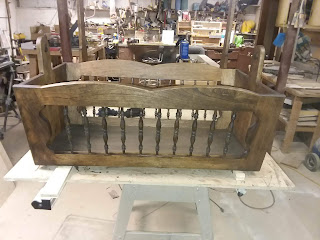
Custom Made Cradle For Our First Grandchild.
It's amazing how every set of plans for making a cradle for a baby has to be purchased. Anything decent on Amazon cost about 20 bucks. Then the purchase wasn't virtual. The plans had to be shipped. Understandable if the plans were full-sized for making patterns but most weren't.
So actually the Saturday, the 9th of February, 2020 is the day I made the plans and templates for the cradle. It's also the night that my intestines shut down. The following day I ended up in the hospital.
The Day after I got out I started rough-cutting the parts for the cradle.
I designed the curve designs on the fly during the build. Made patterns to keep every piece matching.
All square edges have been rounded over with the router.
Nice and tight.
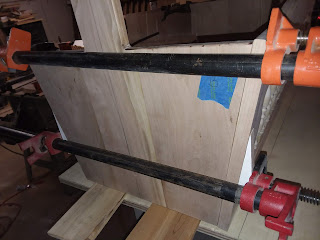
One never has enough clamps. This required old school methods.
And let's do it again.
All glued up. I use wedges to provide a flat edge for the clamps.
The base installed.


